
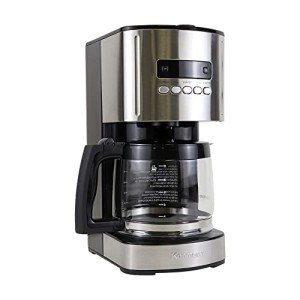
Fixing a Drip Coffee Maker
It's time for you to fix the leak if water is leaks from the safety valve on your drip coffee maker. You're likely to be able repair it.
We will also explore how to maintain a coffee maker and learn various ways to make fantastic coffee with a drip coffee machine.
1. Carafe Leaks
Drip coffee is made by pouring hot water on ground coffee beans, allowing the coffee to seep through while being collected in an vessel such as a pot or carafe. It can be brewed in different ways with various terms being used for the resulting coffee depending on the method used and the equipment employed. Some common methods are called pour-over, French drip, and automatic drip.
A drip coffee maker can be a great way to get your morning fix without having to wait for a cup of tea in a cafe or wait for it to brew in the office. The ease of these machines can be a problem if they fail. One of the most common problems is that the coffee maker drips when you pour. This can be a hassle and make your coffee messy, but it could cause burns to your hands or other surfaces.
The reason the coffee maker may leak when you attempt to pour is because of the way it is set. Typically the spout will be at the back of the carafe near the water reservoir. This is because there isn't enough space on the front of the carafe for a large, easy to pour spout and because of surface tension.
Liquids tend to follow the path with the least resistance and, when it comes to flowing liquids they'll follow where the pressure is lower. Some older drip coffee makers dribble when you pour.
There is a simple solution to this problem though. Instead of putting the spout on the back of the carafe move it to the front so that you can easily reach it with your hands. This will eliminate your dribbling issue and save you the trouble of cleaning your counters each morning.
Another factor that could be causing the dribbling could be the amount of coffee you pour into the carafe. Two tablespoons of coffee for six ounces of water is the recommended ratio. However, the density of your grounds will vary, and you may need to alter the ratio. A kitchen scale is a useful instrument for this, since it will allow you to keep the track of your water and coffee ratios and prevent over- or under-extraction.
2. Spout Leaks
If you've ever looked at different budget drip coffee makers, you know that they come in a wide range of shapes and sizes. Some have thermal carafes while others don't, and some dispense water using spout rings that are tight, while others use large ones.
The small valve at the end of the hose can influence the way that the machines disperse water. The valve can become clogged with gunk and, if it does, spout leaks are the result. It's easy to repair. Unplug the pot and drain the water into the sink. Remove the valve and clean it.
3. Safety Valve Leaks
Whether you're snoozing in bed or stomping into the kitchen gung ho to flip that magic switch, you're expecting your Bialetti pot to work like a charm. But when that cheerful sounding or promising rumbling doesn't occur, it could be the right time to determine what the problem is.
In the bottom of the bucket is a hole and a white tube that leads into it. During the boiling process, this tube carries the water to the drip area. There's a single-way valve inside this tube that lets cold water flow back into the bucket, while forcing the bubbles of boiling water into the coffee maker.
If you're seeing steam or pressure being regularly released from your coffee pot through the safety valve there's a possibility that it's blocked and requires repair or even replacement. To fix this issue, put an empty bucket underneath the safety valve pipe and press upwards on the lever and let it snap back several times (use gloves since the water can be hot). If this doesn't work, it may be the right time to consult a professional. This is a time-consuming task, as the valve must be removed and dismantled.
4. Filter Leaks
The reservoir and filter are the core of every drip coffee maker. They are the place where water begins and ends its journey to brew your morning cup of coffee. During the brewing cycle it is essential to follow proper guidelines regarding water usage along with cleaning and maintenance routines. This will ensure that your coffee maker will continue to work at its best.
When you turn on the coffee pot the reservoir of water will be heated by an element of heating resistance. The heat will rise through an elongated white tube that lies below the reservoir's base. The hot water then flows over the coffee and begins to absorb flavors from the coffee grounds. When the hot water is poured over the ground, the coffee oils released during roasting are picked up. filter coffee machine give coffee it's distinctive aroma and flavor.
The coffee grounds that sit for too long could lead to mold growth. To prevent this from happening it is recommended to store the wet coffee grounds in a way that allows them to dry faster (e.g. hanging, separated from the coffee maker or propped up to allow air flow or air flow, etc. ).
If the coffee grounds used aren't coarse enough, or the wrong size for your drip coffee maker, they can block the water flow or result in an overflow. For this reason, it is recommended to use a single, appropriately-sized filter or paper for your drip coffee maker. It is also recommended to experiment with brew times to determine which settings provide the best taste for your preferences.
For optimal performance for optimal performance, regular cleaning and decaling is also necessary. To remove the buildup of minerals adhere to the manufacturer's instructions on how to clean and decal your machine. Use filtered or bottled drinking water instead of tap to improve the flavor of your coffee.